Follow me as i do a step by step edit of a car shoot

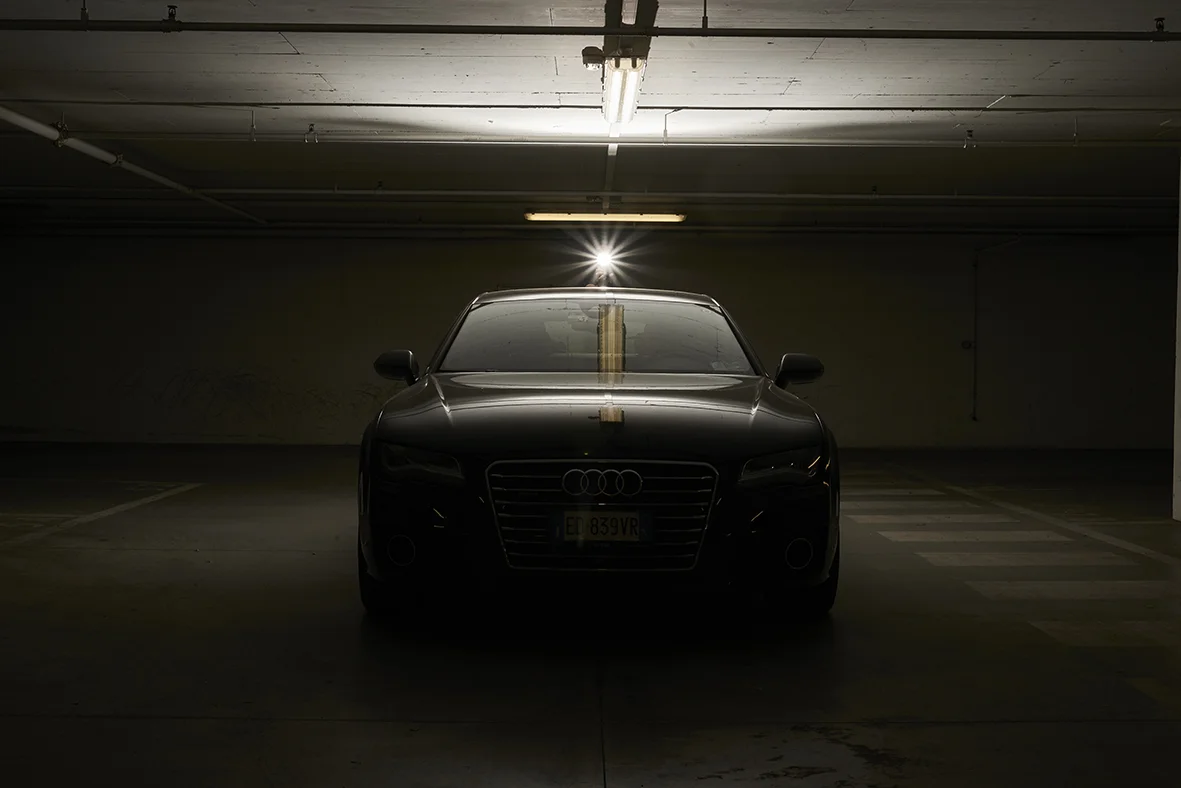
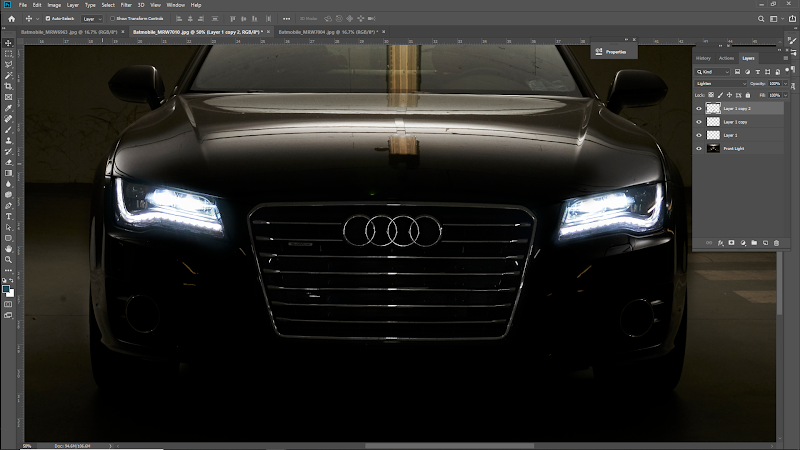
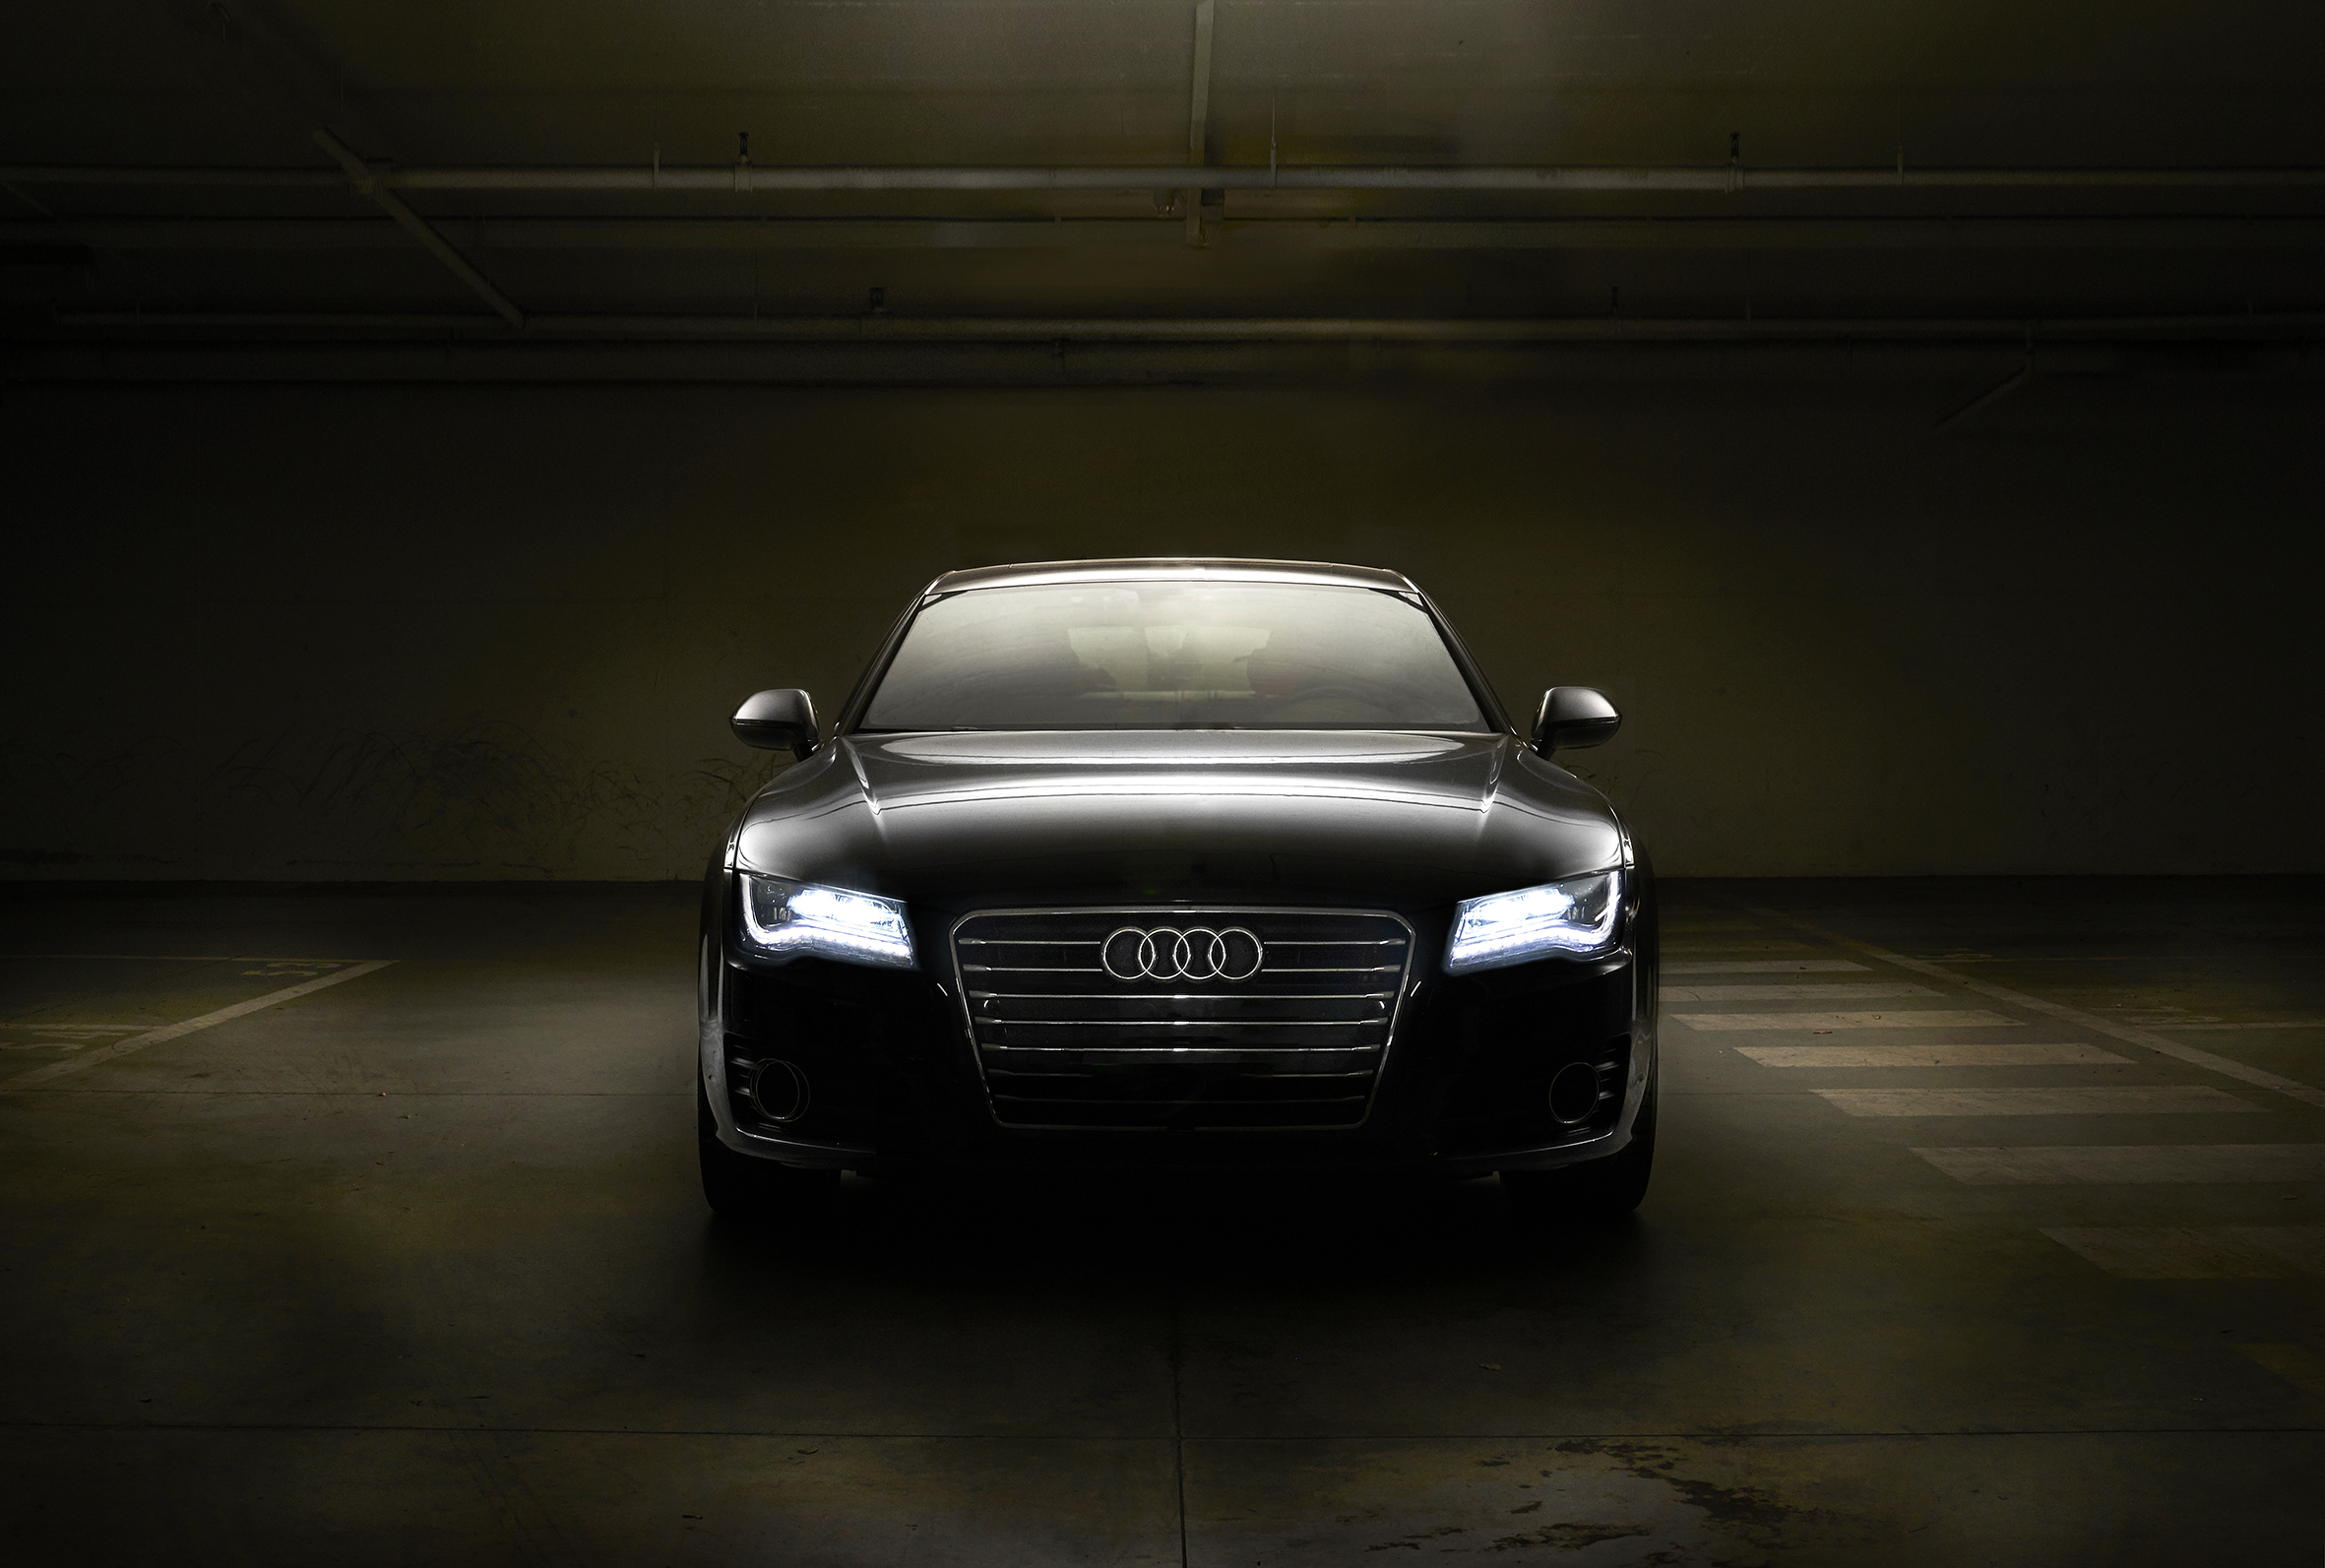
Before…

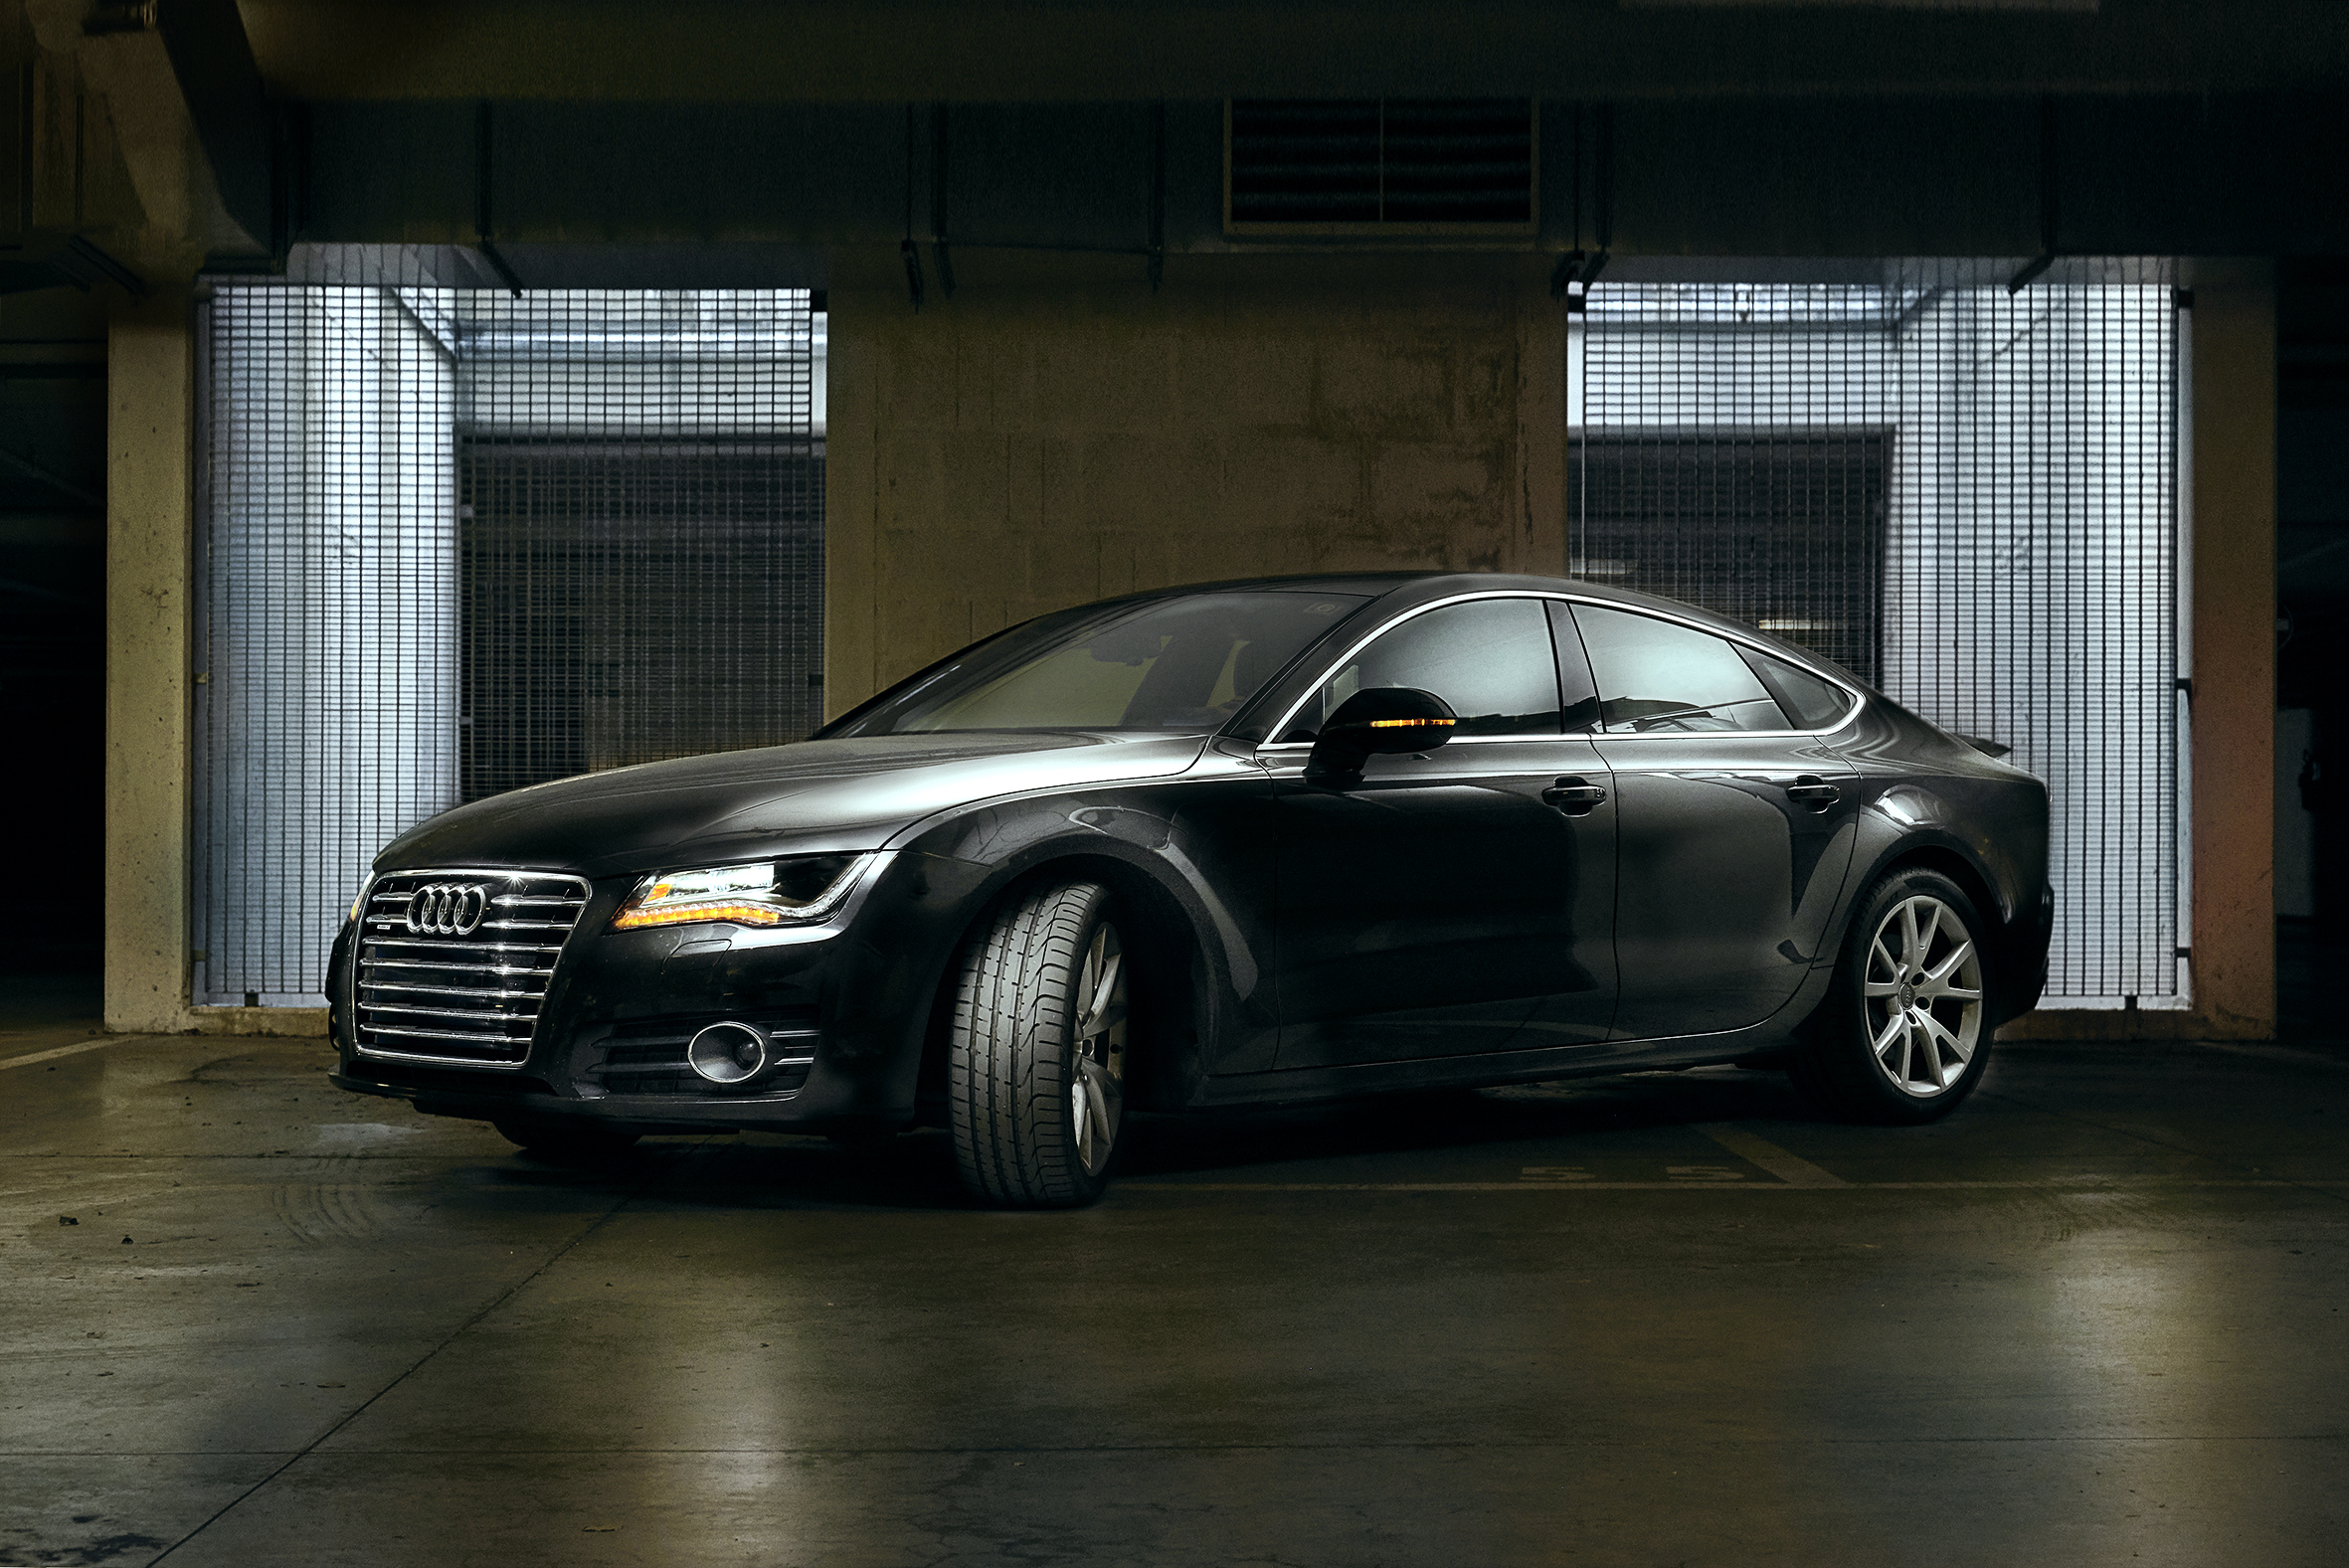
…and after
What a difference!
So, let's get to it. Last time I made an article describing one of my first experiences with car photography. This time I want to show you how I combined my different shots into the perfect picture.
As I mentioned in the other article, the base picture is usually the picture where you like the background the most. Usually my base picture is a picture without no light, so my background keeps dark. The base picture could also be the picture where the only light you see is the lights of the car. For this particular picture I choose to use this one where the light comes from above, as I really like the light it casts on the ground.
I start by choosing the pictures that I want to use, where the light is just how I like it. When selecting the pictures, I imagine all the different parts that I want to put focus on and leave the other parts in the dark. I highlight the parts of the car that makes the car special and ultimately will be the factors that sells the car.
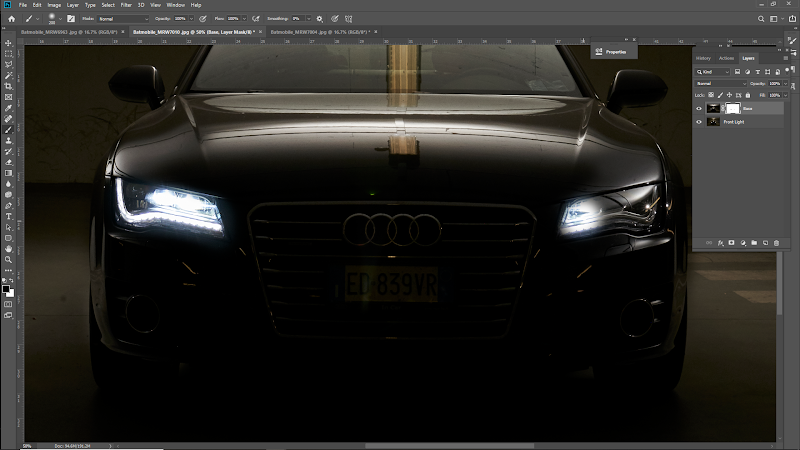
This image is created by 5 different pictures. When you have found your base picture, you drag the first image over it (holding down ctrl+shift so it places exactly over the other layer), so it creates a layer on top of the base image. First, I focused on the right side of the front light. When you drag it over, make sure that you unlock your base layer and move it above. For your convenience I called my base layer “Base” and the other layer “right light”. I change the order of my layers, so the “base” is on top. Then I create a mask on the base layer. You make sure that your layer mask is selected and that you color with black in it. You want to color where you want the “right light” layer to be visible.

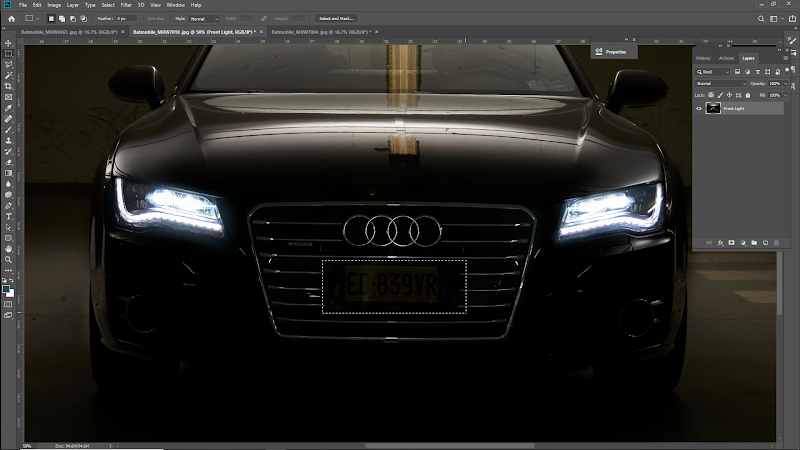
When this is done, and you are sure that there is no more you want to get from that image, you can go ahead and merge the two layers. Find an image that has the same feature highlighted of the car on the opposite side. Again, make sure your base layer is on top when you make your layer mask. Now I bring the picture where the car lights are turned on in, using the exact same method.
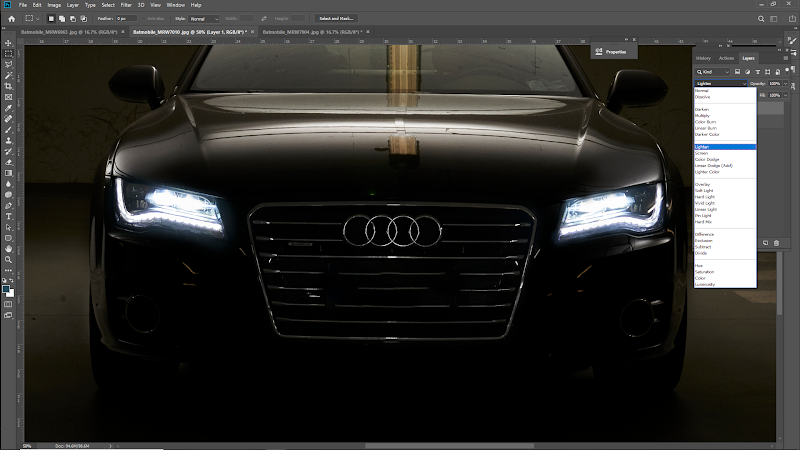
From this image, I also have a great light on the emblem and the grill of the car, that I also bring in to the “base” picture. I merge the images, and while I am here, I use the “content aware” tool (that you find under “image”, “fill” or by pressing shift+F5) to remove the license plate as well as removing the yellow color that I have on the grill using the “sponge” tool on desaturate.
When removing the license plate, my lines in the grill did not come out so well, so I removed them by using the “spot healing brush” tool and copied the line above. It works like this. Take your “mask” tool and mask off the line that you like. Push ctrl+J, to copy the mask into a new layer. Set the blending mode of the layer to “lighten”. This way only the light parts shows. Move the layer down where the line is missing. Do this for all the lines that are missing.
Flatten the image and continue to add pictures and light to your car. When you have added the pictures that adds something to the car, you might realize that there are some places where you do not have perfect symmetrically lighting. This is what you are going to do. Mask of the area where you have the lighting that you want to duplicate to the other side. Use the ctrl+J to copy into a new layer. Set the blending mode to “lighten”. Push ctrl+T for transform and flip horizontally. Place the new layer where it should be and add a layer mask. Paint with black on things you might not want to see. Use this technique on all the places where you want to add some highlights.

Flatten the image and continue to add pictures and light to your car. When you have added the pictures that adds something to the car, you might realize that there are some places where you do not have perfect symmetrically lighting. This is what you are going to do. Mask of the area where you have the lighting that you want to duplicate to the other side. Use the ctrl+J to copy into a new layer. Set the blending mode to “lighten”. Push ctrl+T for transform and flip horizontally. Place the new layer where it should be and add a layer mask. Paint with black on things you might not want to see. Use this technique on all the places where you want to add some highlights.
These are some other steps you want to take:
Use the “Spot healing brush” tool to remove all lines or dust that are distracting to the picture.
Use the “content aware” tool to remove the larger problem areas that you want to remove in the picture. In my case I used it to remove the lamp that is above the car that is giving me a reflex.
When all this is done, I used the “sponge” tool on “desaturate” to make my car neutral in color.
To finish the picture, have a look at the background and decide what you want to do. On this picture, I brightened up some spots on the floor by using the “history brush” tool in “screen” mode. When you are using this tool, it is important that you are in the present history state in the tap “history”. I also added some spots of color by using the “sponge” tool on “saturate” to create some life in the picture. Parking garages always contains the most beautiful mix of color in the concrete that just needs to be encouraged a bit. Give the picture a little “level” and “curves” if needed and finally, you can straighten up your image. It is important that crop and straighten are the last things you do, as you need your pictures to fit perfectly together when you merge them.

This is how you get a super cool car picture.
Go out and shoot great things!
If you liked this article and applied it, I would love to hear your feedback and see your pictures! Go to my Facebook @MakeUpArtistMalouReedorf and send me a message. I would love to connect with you!
Malou Reedorf is an international PermaJet ambassador.


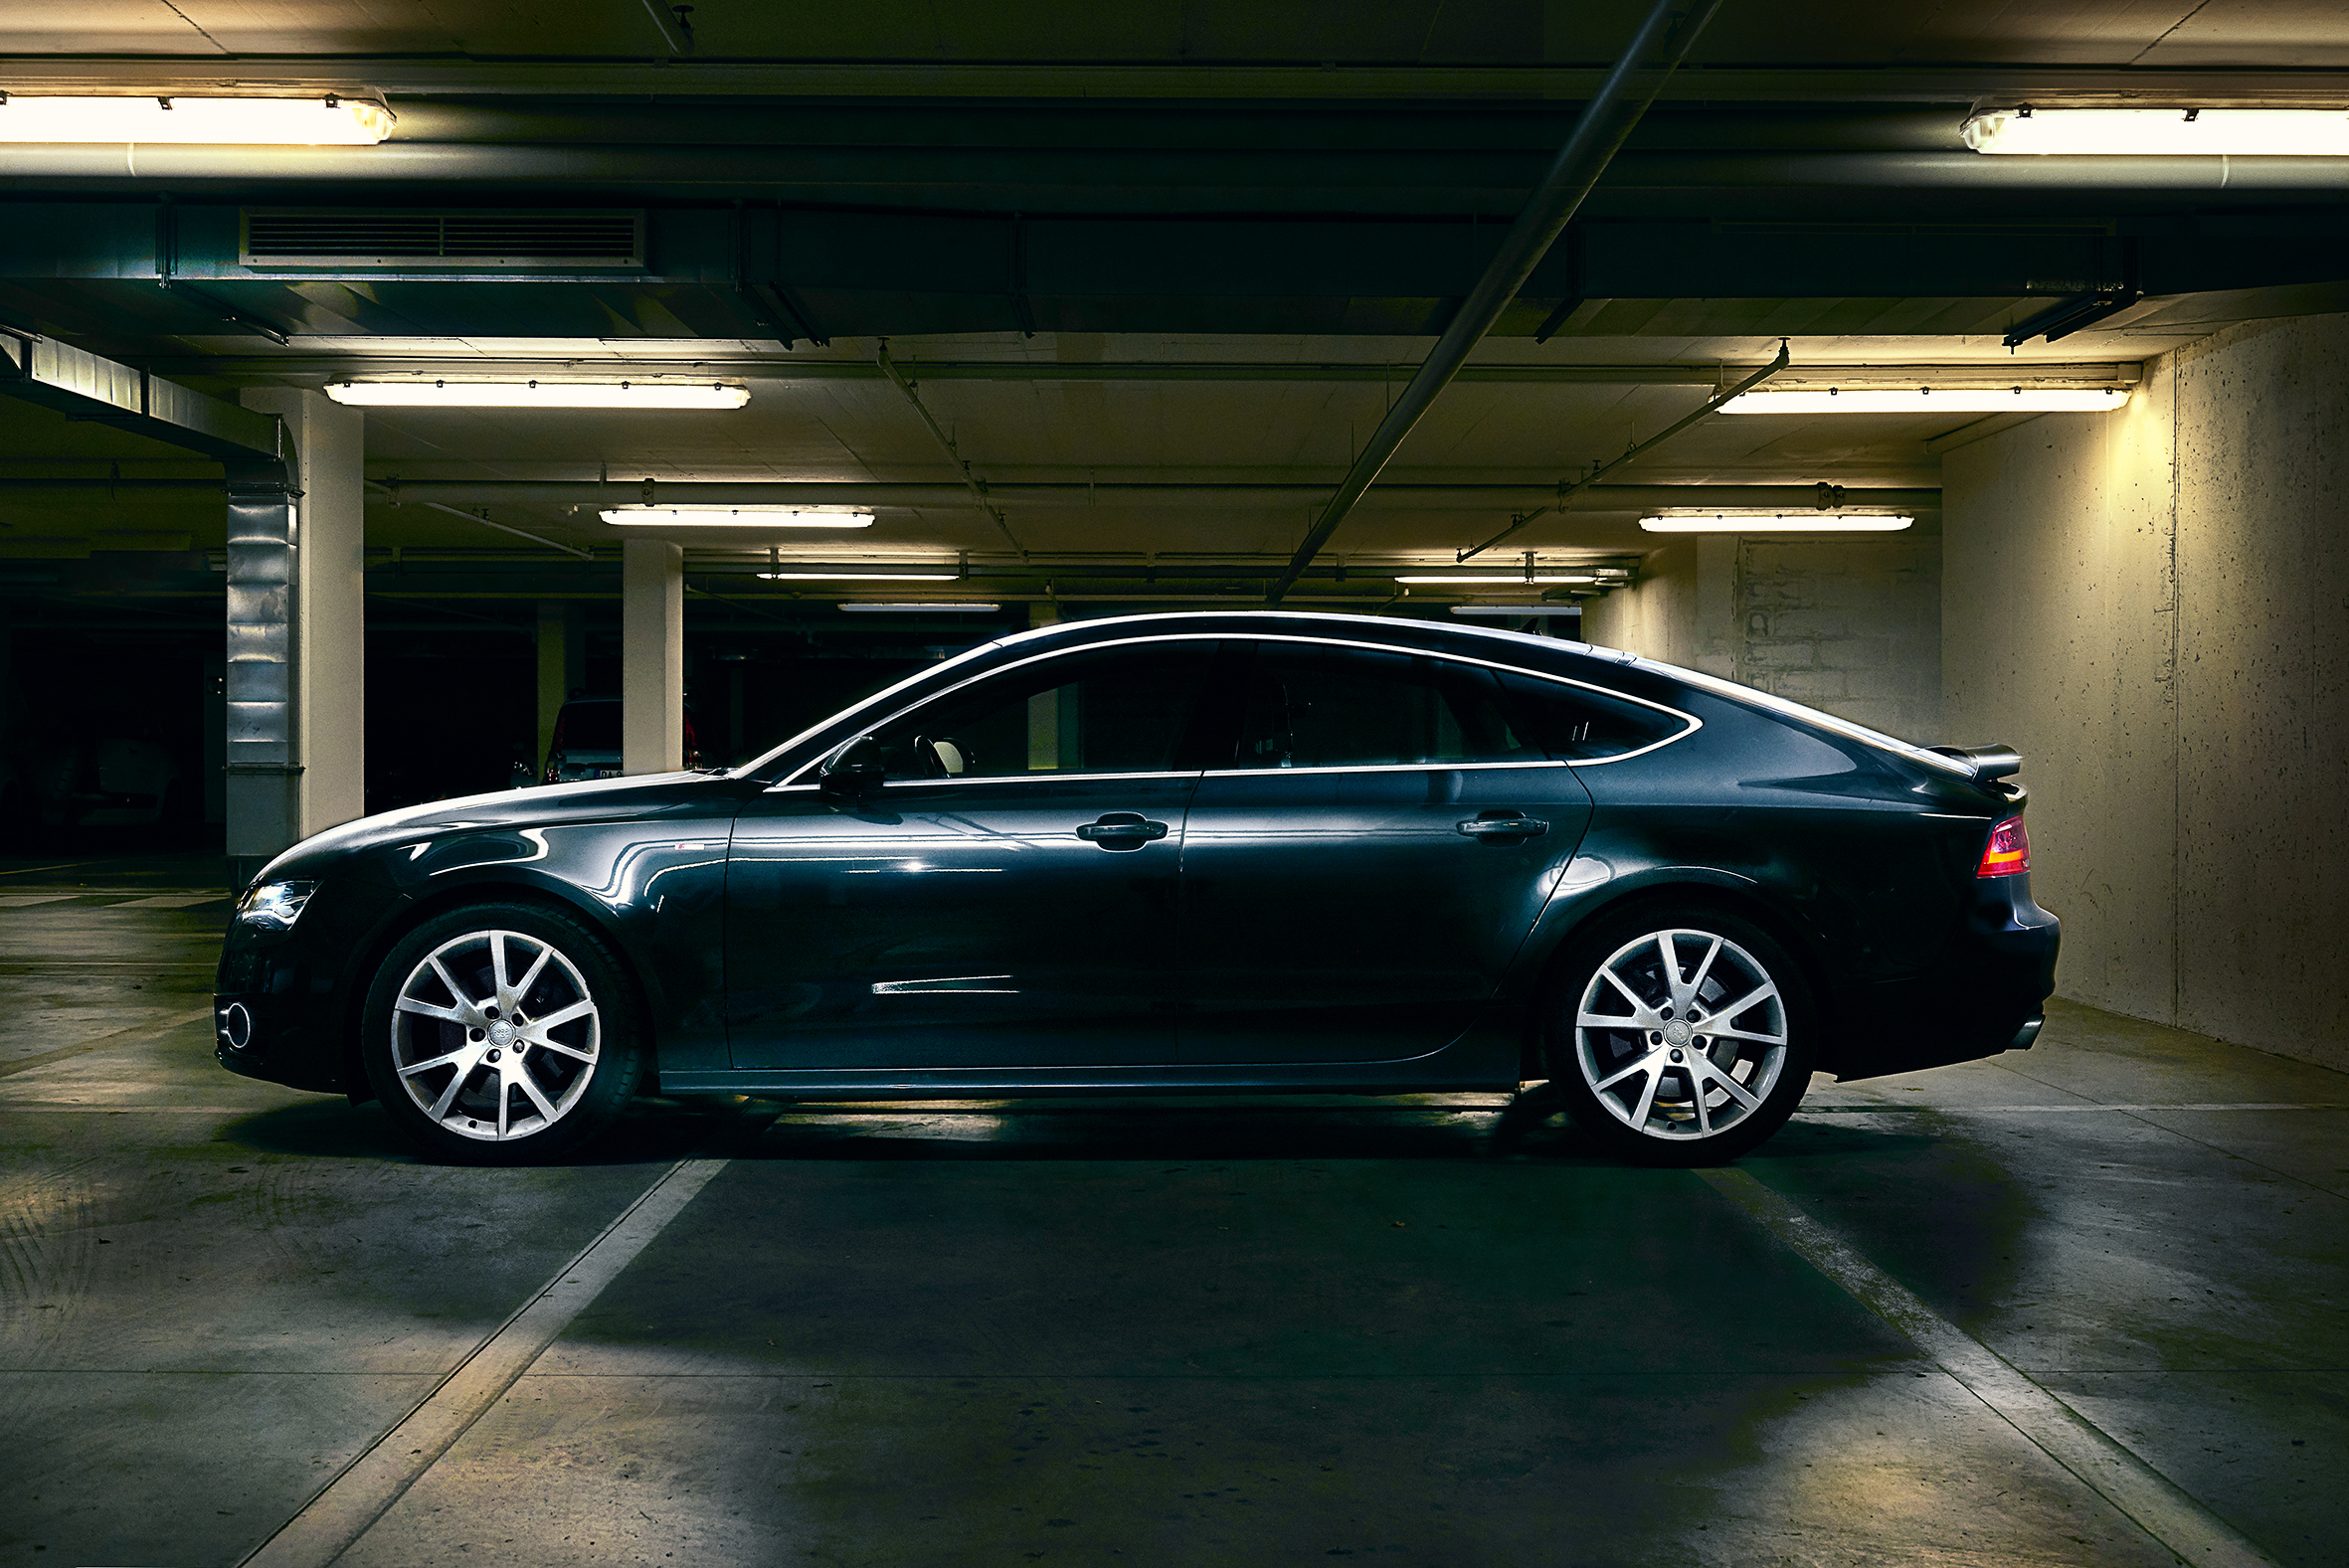
… if curious, this was the first car picture that I did!
